
*This post may contain affiliate links, which means I may receive a commission (at no additional cost to you!) if you make a purchase using any of these links.*

Do you know what makes drinking Champagne more fun? Drinking it out of a homemade, custom ice bucket! Kyle and I aren’t sure what we’re going to do about our wedding next year, so I’ve been Pinterest-ing quite a bit, and I’ve come across some absolutely gorgeous DIY floral ice buckets over the past few months. Since it’s summertime, I thought it’d be fun to invest in my own ice bucket mold and trade in the flowers for citrus slices instead. Long story short– I loved my DIY citrus ice bucket so much that I had to share it with y’all, too. The mold is seriously so easy to use, and it creates the most gorgeous seasonal centerpieces. Keep reading for a step-by-step DIY wine chiller tutorial for summer!
DIY Citrus Ice Bucket

What You Need
Probably my favorite thing about these ice bucket molds is that you can fill them with whatever decorations you want. I’m sharing more examples below, but flowers for spring, citrus slices for summer, and berries for the holidays are just the tip of the iceberg. In my case, I had a bunch of lemons lying around and thought a citrus ice bucket would be cute for one of our summer date nights. Here’s everything I used to create mine–
- Ice Bucket Mold– I use this ice bucket mold, and it’s awesome! It’s tailored perfectly for a single bottle of wine. It’s clear, too, which is great because I like to see how everything looks before I freeze it. Also, spoiler alert– ice bucket molds make amazing hostess gifts! I’ll definitely be giving a few away as Christmas gifts this year.
- Citrus Slices– Citrus slices are perfect for summer! I only used lemon slices, but you could throw some lime, orange, or grapefruit slices into the mix, too, for extra color!
- Leaves– I picked some leaves off our peony bush and some from a bouquet for variety. If you prefer a lighter green– or if you’re making an ice bucket for fall, eucalyptus would be really pretty, too!
- Flowers– I used baby’s breath, but you can add in rose petals, spray roses, rosebuds, etc. for more color!
- Water– I recommend using store-bought distilled water or boiled water for a crystal-clear mold.
Also, just a note– you can make your own single bottle wine chiller with two different-sized buckets. Just position the smaller bucket inside the larger bucket and secure it with a brick or rocks. I originally tried to go this route, but I couldn’t find the right-sized buckets. Plus, this bottle chiller ice mold is under $40 and just makes it so easy.
How to Make Your Own DIY Wine Chiller

Making your own ice bottle chiller is super easy– and it’s such a fun way to add a little something extra to your party or date night! To start, grab your ice bucket mold (homemade or store-bought), along with all the pretty little things you want to fill it with. Then, arrange the decorations in the mold. I put in a row of lemon slices, followed by some leaves a few sprigs of baby’s breath, and then another row of lemon slices, and so on.


Once the mold is filled to the tippy top, give it a final look. I normally make a few little last-minute modifications, just to make sure everything looks lush and evenly-distributed.


Finally, pour in the distilled water, secure the lid, and pop it in the freezer! Since it’s so dense, I recommend letting your DIY wine chiller freeze for at least eight hours.
Once your ice bucket is completely solid, take it out of the freezer and carefully remove it from its mold. Unfortunately, this step can be trickier than it sounds. Don’t worry, though, because I’ve gotten the removal down to an almost exact science. I fill a large mixing bowl with hot water and then let the ice bucket mold sit inside for five minutes. Then, if it doesn’t pop right out, I hit the sides of the mold on the edge of the sink until I hear cracking. It slides right out every time!

After you’ve successfully removed the ice bucket wine cooler from its mold, place it on top of its stand inside its stainless steel tray to avoid water dripping on your table. I’ve found that the stainless steel tray also helps extend the life of the ice, too.

Finally, pop a bottle of vino or liquor inside– and enjoy chilled drinks for four to six hours!
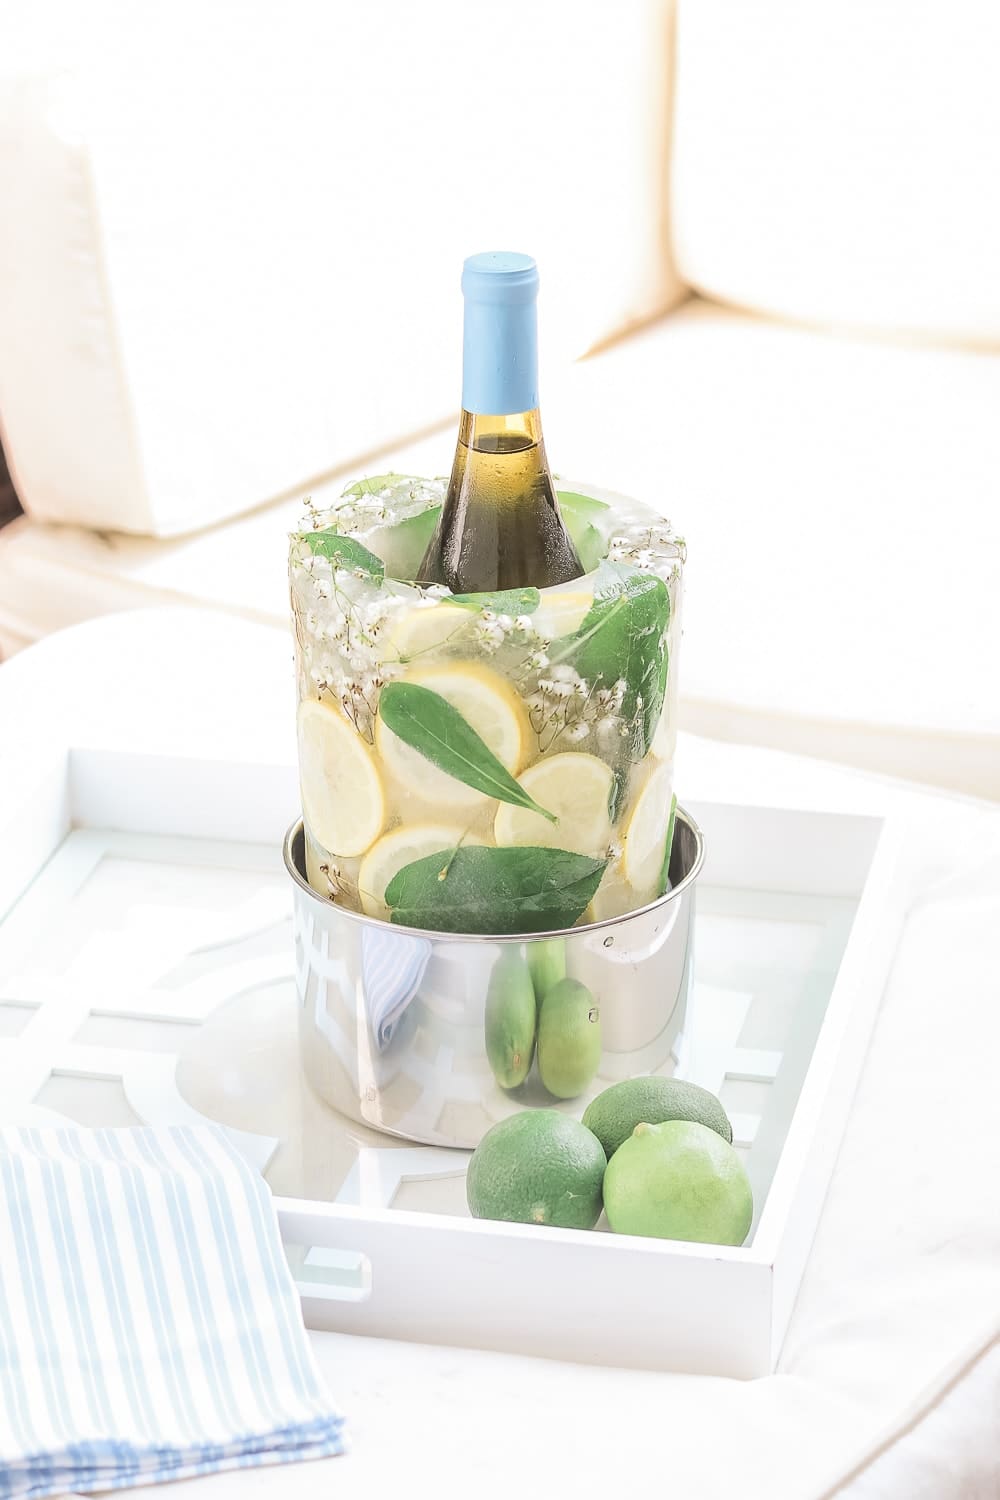

Super pretty, right? Seriously, this DIY ice bucket makes the most gorgeous centerpiece for summer parties! I pretty much use my mold weekly now for every-day gatherings and date nights, too. Aesthetics aside, it legitimately does a bang-up job keeping vino cold, too!
More Ice Bucket Ideas for Parties
If you need more ice bucket ideas for parties later on this year (or next), here are a few–
- Colorful mums and eucalyptus for fall (Halloween or Thanksgiving)
- Variety of brightly-colored foliage for fall (Halloween or Thanksgiving)
- Cranberries and rosemary for the holidays (Christmas or New Year’s)
- Red spray roses and greenery for Valentine’s Day
- Light and dark pink rose or peony petals for spring (Easter or Mother’s Day)
- Lemon and lavender for spring/summer (Easter, Mother’s Day, or summer parties)
- Pineapple slices, basil, and lime for summer
Another fun (and less conventional) idea is to fill your single bottle wine chiller with a pillar candle to create a frosty-looking luminary for holiday parties!

What theme/pattern do y’all think I should go for next? I was thinking of creating a custom bottle chiller for Halloween, but I’m not totally sure what to put in it. Maybe some orange leaves and black twigs? Any suggestions would be appreciated! Also, if you have issues making your own custom ice bucket, please don’t hesitate to leave me a comment or shoot me an email. I’m happy to help!
Click below to shop!


I have a question. How do you make the leaves & other things stay upright in the water while freezing?
Hi Cathy! Sorry for the late reply!
I’ve never mastered that unfortunately. I like to use flowers, leaves, and citrus slices so that direction doesn’t matter so much. I will say, though, that the more fillers you use, the easier it is to keep things where you want them. You can also freeze in phases (add a small layer of fillers, freeze for a few hours, add another layer of water and fillers, freeze again, repeat) to help control the overall look more. Hope that helps!