This shop has been compensated by Schwarzkopf. #FashionColorExpert #sponsored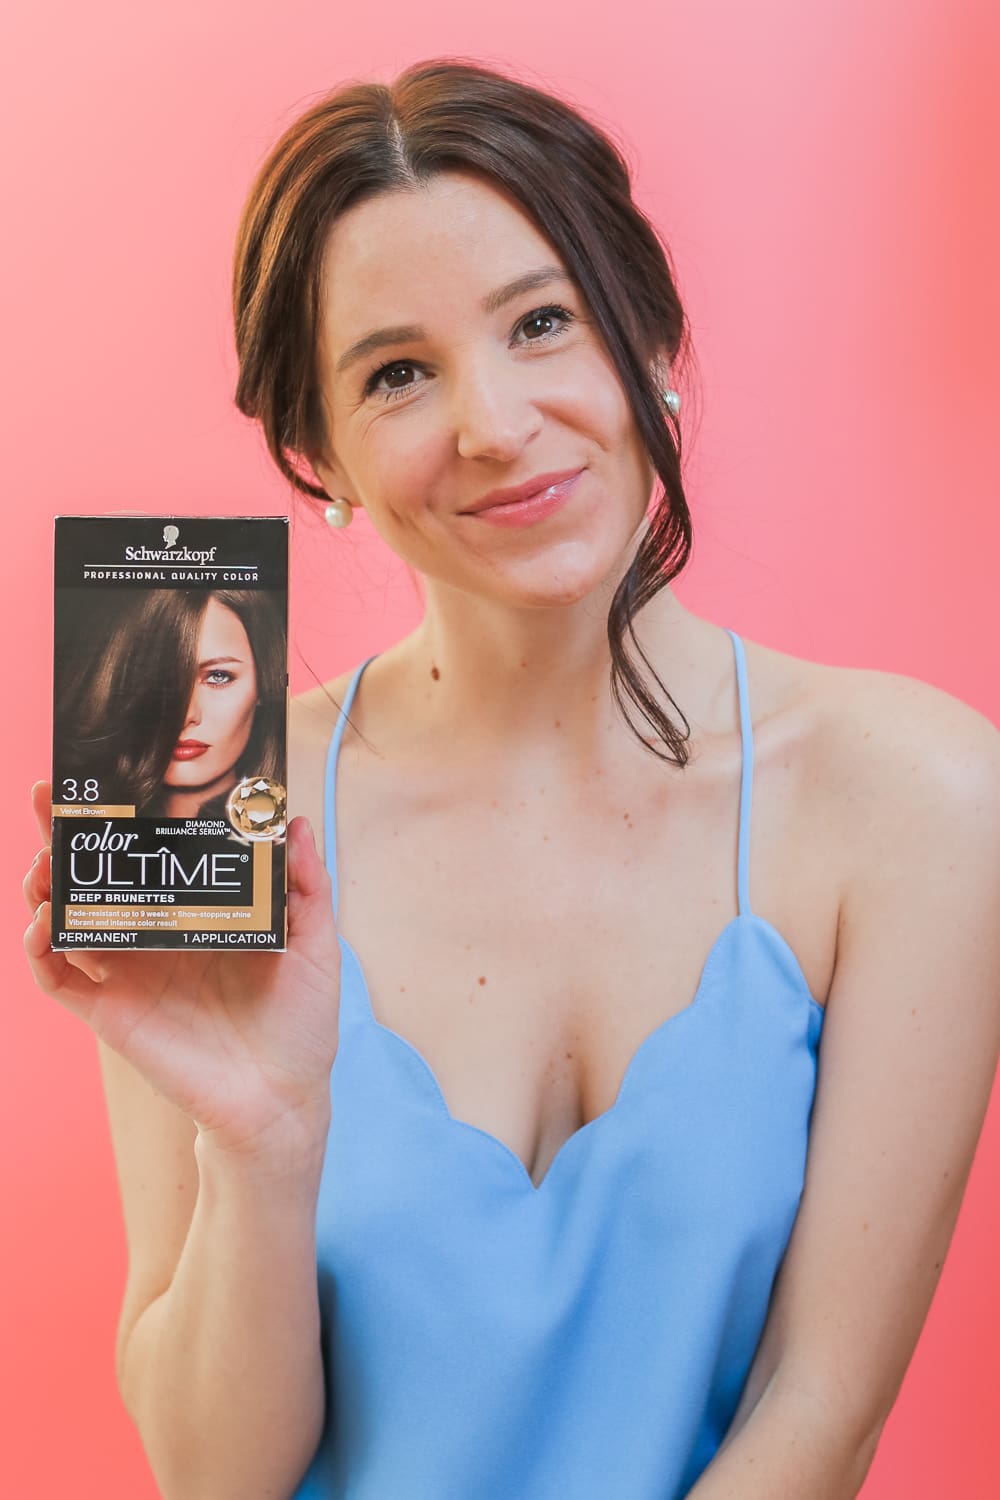
Spring is around the corner, and I’ve really been wanting to do something different with my hair. We’re in savings crunch mode right now, though, so I’ve been exploring a handful of DIY hair tips and tricks over the past few months. As much as I’ve grown to love at-home hair dye, I’m terrified of cutting my own hair. So, I went to a salon and chopped off about 5 inches last week. I also wanted to go a little darker for two reasons: to add some dimension to my hair and to cover up some random grays that have started popping up (darn you, thirties!). I’ve talked a little bit about my favorite at-home hair color brand on my blog before, but I’m also sharing a step-by-step Schwarzkopf® color ULTÎME® hair color tutorial, plus a super easy braided chignon for spring, in today’s post!
Before getting started, I want y’all to know I’ve tried some duds over the years. Schwarzkopf® is the only brand I’ll personally recommend to family and friends. I’ve never had an issue/irritation from their formulas, their color is vibrant and long-lasting, and their price point is right where I need it to be. I also love their genuine, “true to box” hair color results. What you see really is what you get, which is unfortunately not always the experience I’ve had with other brands.
Spring Hair Color Update
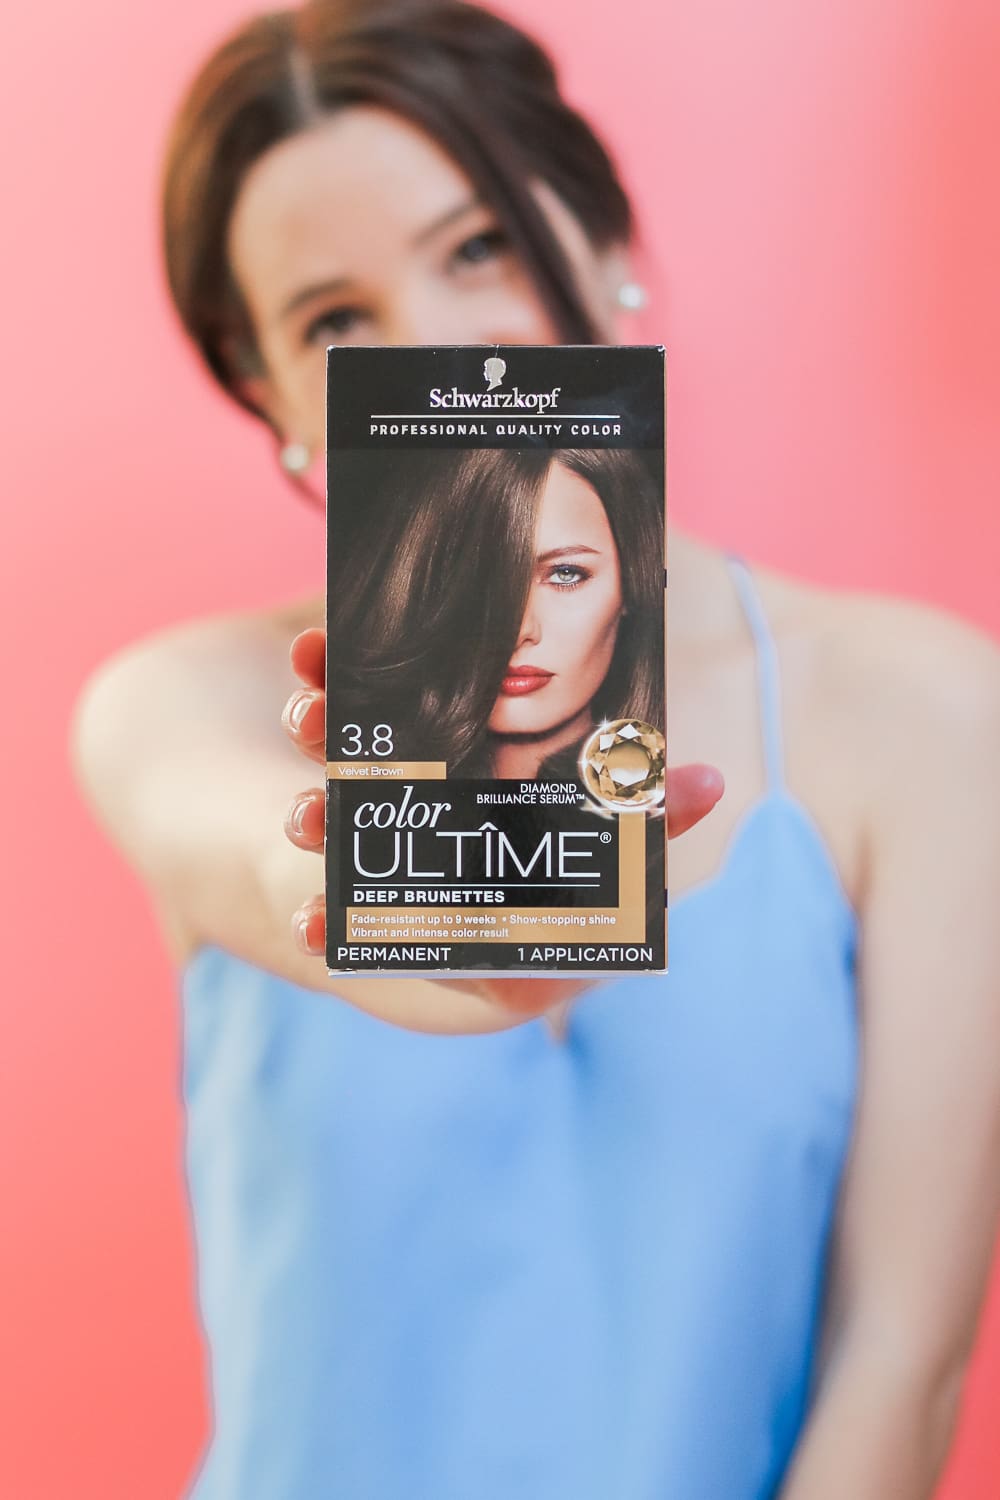
This time around, I wanted to go a tad bit darker without going black, so I chose Schwarzkopf® color ULTÎME® in 3.8 Velvet Brown. Schwarzkopf® color ULTÎME® defies fading for up to 9 weeks of vibrant color, so I won’t need a re-up until the end of May.
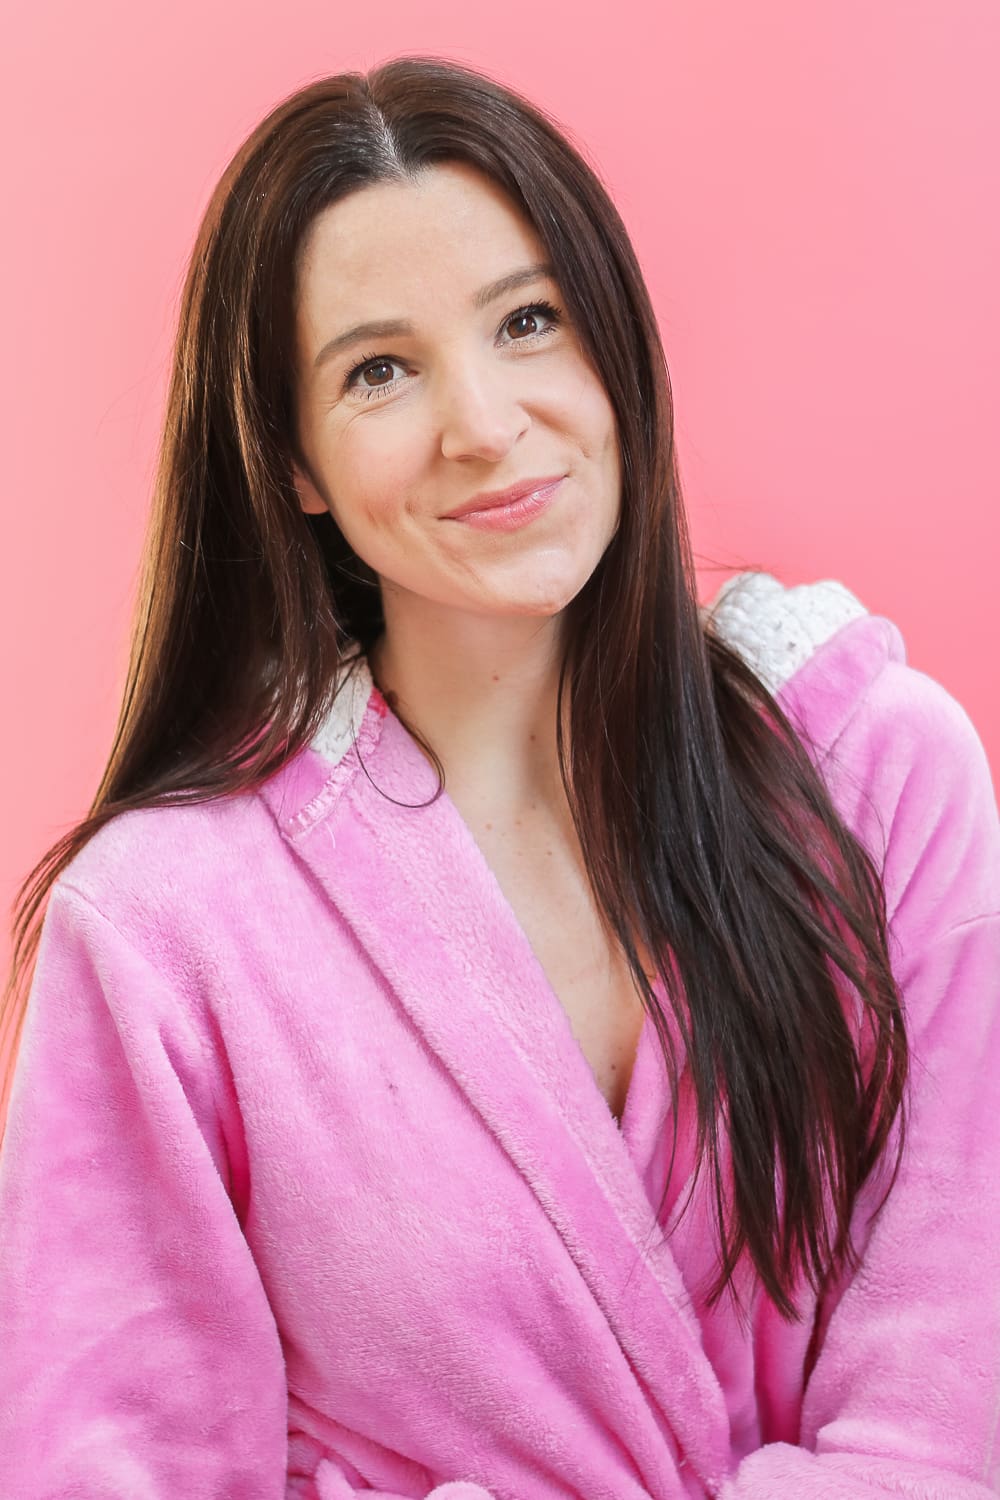
Before diving into the at-home hair color process, you can see my before/after shot here!My hair looks vibrant and feels shiny, and I love that I only had to spend $10 at Walmart to get it looking fresh again. Try Shopkick today and earn rewards on your purchase!
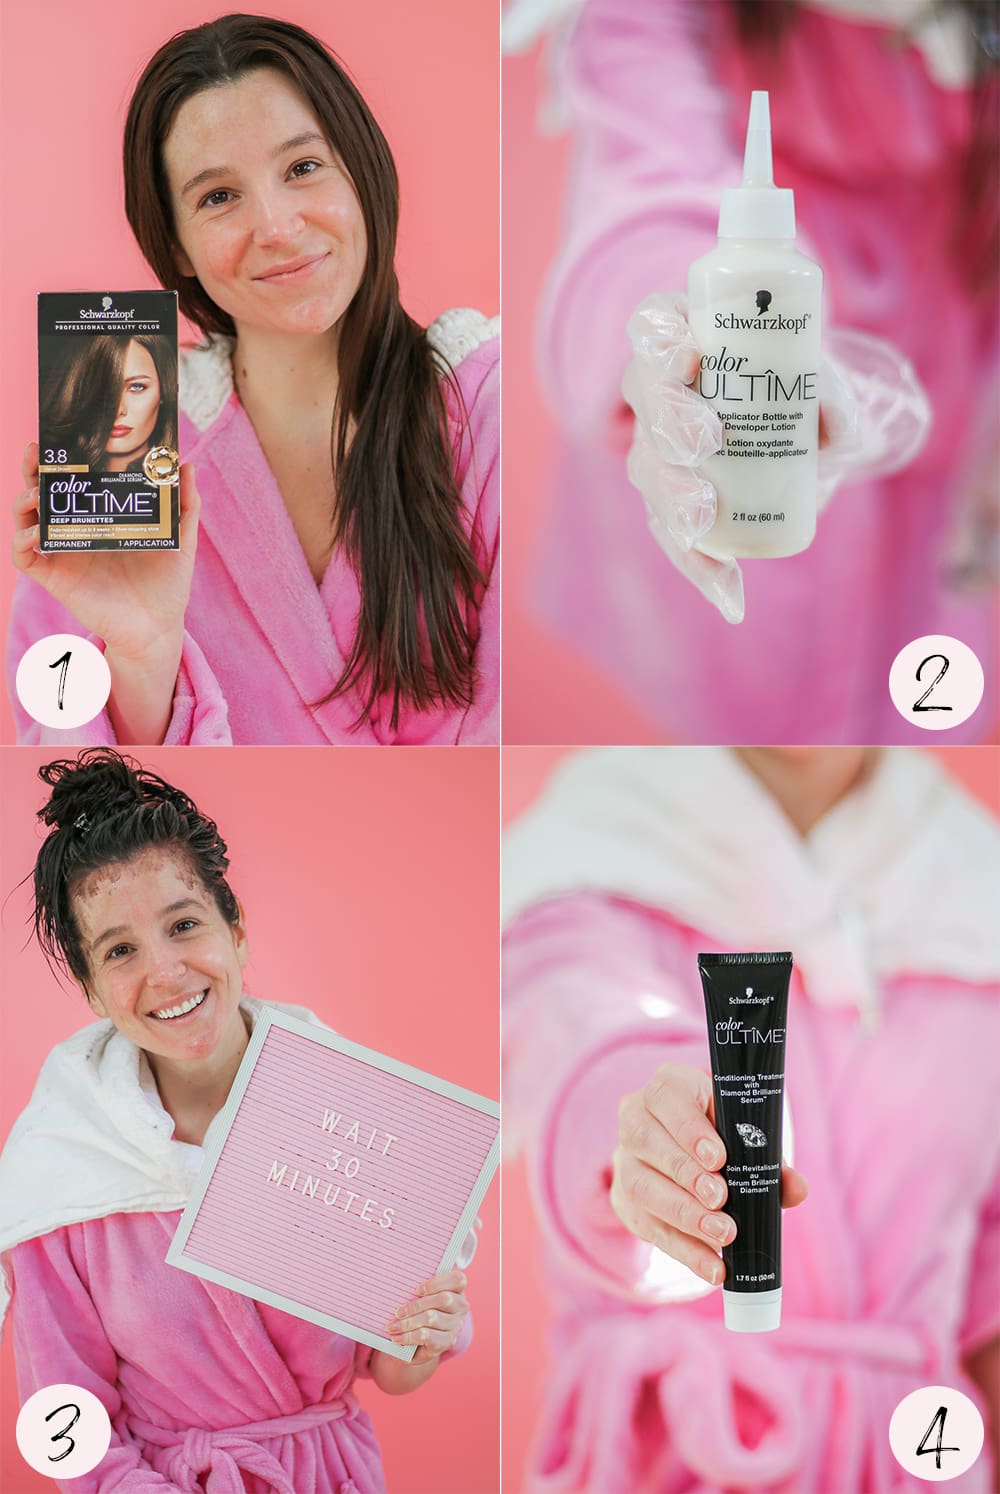
As for the process itself, consult the directions in your Schwarzkopf® color ULTÎME® box before getting started. In case you’re a beginner, here are some tips and tricks to keep in mind on your first couple go-arounds-
Step 1: Start with dirty hair. As gross at it sounds, dirty hair creates a protective barrier of natural oils and dead skin cells that protect your scalp. Plus, hair color allegedly also holds better to dirty hair, too! Step 2: Put on the provided gloves and mix the developer lotion. Before applying, make sure your shoulders are covered, especially if you have long hair. Oh, and wear clothing that you won’t mind if it gets dirty and/or ruined in case the color splashes. Step 3: Apply the lotion all over–I repeat, all over your hair. It’ll feel like overkill, but it’s important to make sure your whole hair is covered, especially for more dramatic color changes. Once applied, wait a full 30 minutes. Step 4: Rinse hair color out and promptly apply the conditioning treatment. And bam, you’re done!
Finally, enjoy your soft, healthy, freshly-colored new hair!
Easy Braided Chignon Hair Tutorial
Kyle and I are hoping to either buy a house or small business next year, so I’ve been slowly learning to recreate simple yet sophisticated hairstyles at home in lieu of paying for blowouts. This braided chignon is perfect for spring, and it’s so easy y’all. It’s also become my go-to easy updo for weddings and dressier events!
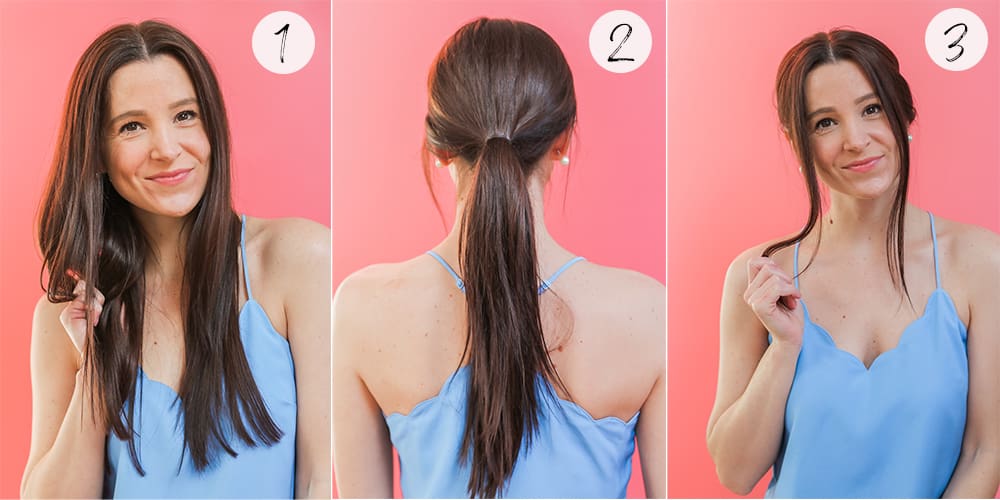
To recreate this look at home, start with dry hair (step 1). Then, using an elastic that matches your hair color, pull it into a low ponytail (step 2). Leave a few small pieces out in front for later (step 3).
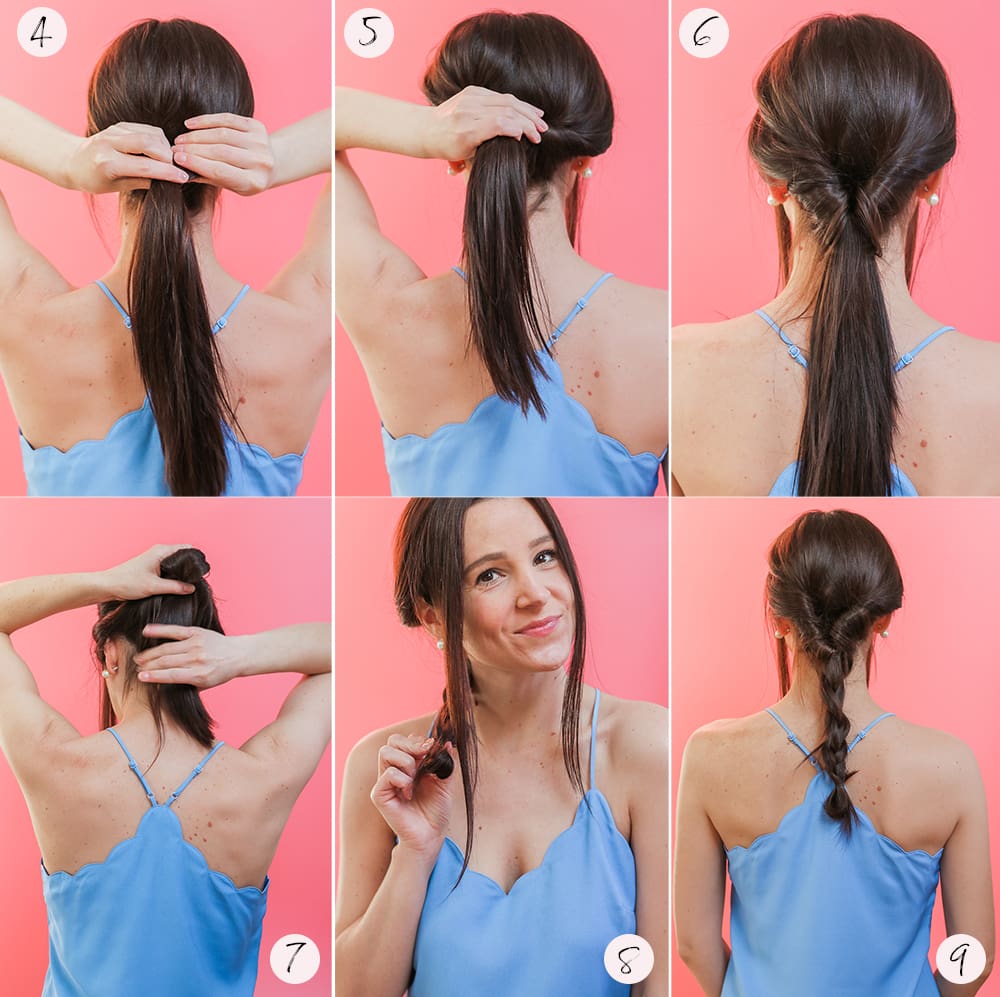
Next, poke your fingers through the hair in front of the elastic to create a pocket of space (step 4). You may need to loosen the ponytail to do this, which is fine. Next, while holding the pocket open with one hand, flip the ponytail up and through it, creating a “topsy tail” (steps 5-6). Depending on the length of your hair, you may want to flip the ponytail once or twice more to create a more dramatic twist (step 7). Then, braid the ponytail. Before securing with an elastic band, pull your ends halfway through the elastic, creating a little loop, to avoid unsightly stray hairs (steps 8-9). This also makes the braid easier to roll in my experience!
If it’s looking a little messy at this point, you’re on the right track. This braided chignon updo is supposed to look undone.
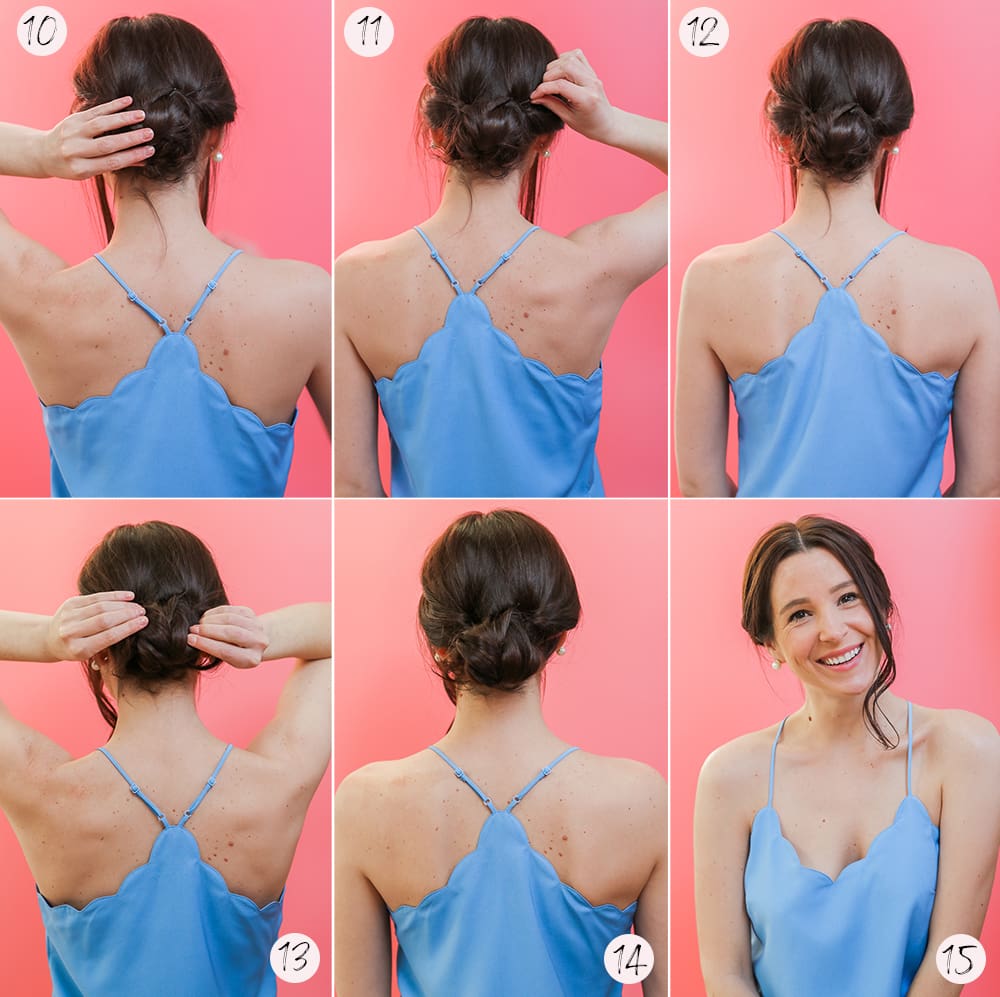
Next, take the end of the braid and tightly roll it up into your ponytail base (step 10). Secure it in place with bobby pins. (steps 11-12). Spray your braided chignon generously with hairspray, sweeping away any noticeable wispies and stray hairs. Then, gently pull apart pieces of the braid to create an undone look (steps 13-14). Finally, loosely curl any pieces you left out front (step 15). If it feels like too much hair in your face (like admittedly mine did), tuck away any unwanted strands by loosely sweeping them back into the chignon and securing with bobby pins.
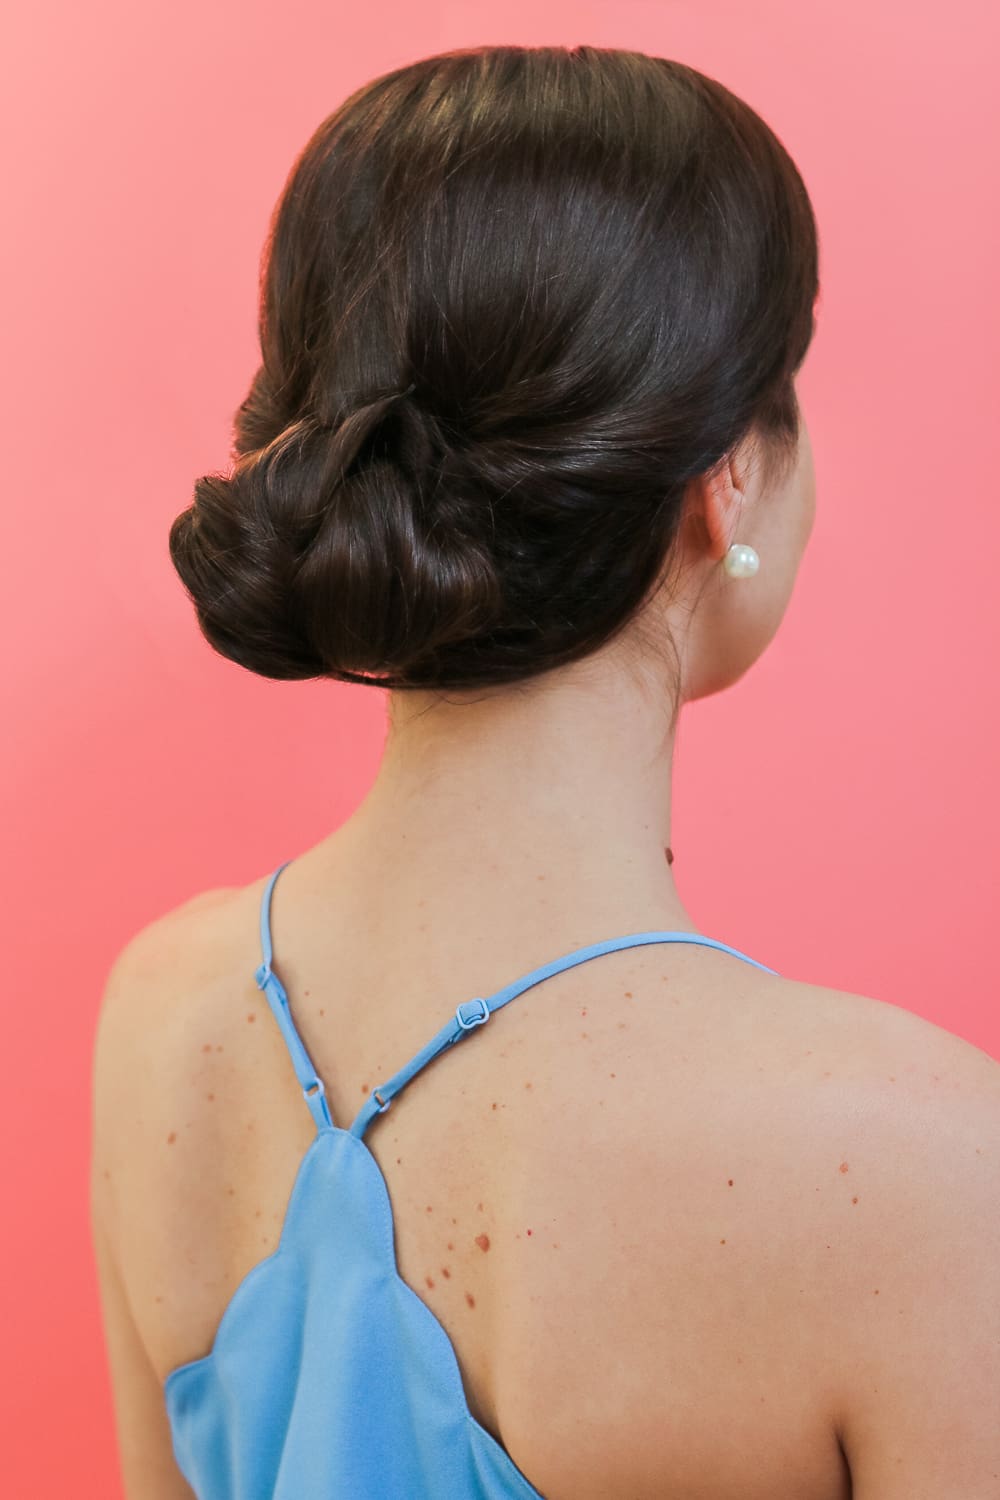
Give your braided chignon a final spray with hairspray, and you’re ready to go! This easy updo for medium and long hair is perfect for spring weddings, graduations, and just about everything in between.
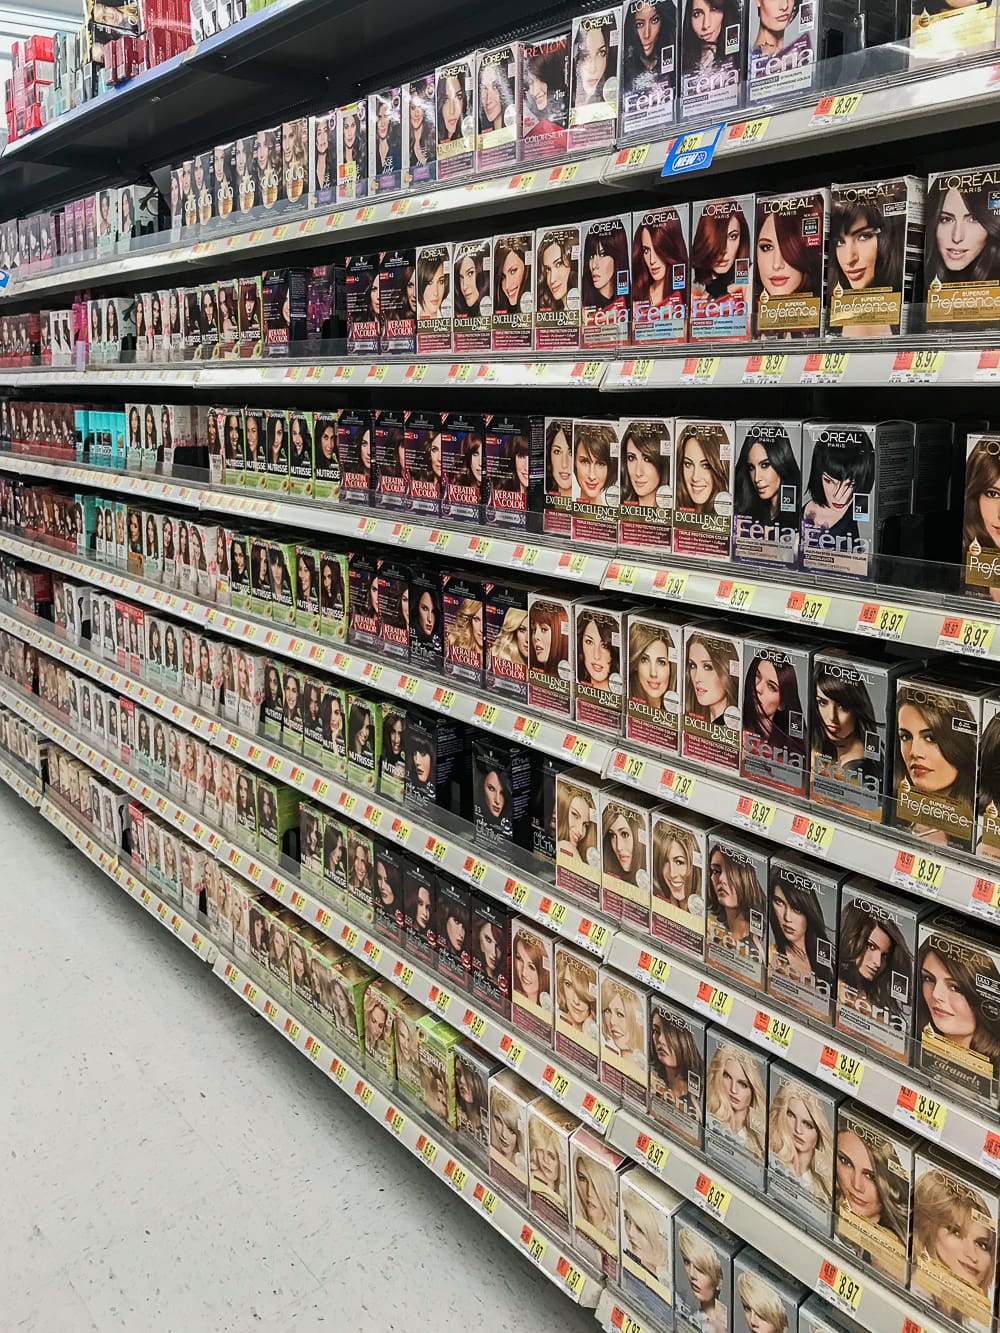
If you’re thinking about trying Schwarzkopf® color ULTÎME® for yourself, click here to purchase online. You can also head to the hair color aisle at Walmart. They’ve got some exciting new colors and a brand new model on their new box (unfortunately not on the one I purchased though), so keep an eye out. Hint: If you’re a Pretty Little Liars or YOU fan, you already know and love her!
Thanks so much for reading, y’all! If you have any questions at all about my at-home hair coloring experience or this braided chignon tutorial, leave me a comment or shoot me an email. I’m happy to help!






Wow your color looks great! I’ve always been scared to try boxed color because it usually looks so flat. Was this more multi-dimensional? It definitely looks like it in these pics but I wasn’t sure if that was the dye or the lighting. Thanks for this post! I definitely will consider giving this a try!
Thanks so much, Megan! This color was multi-dimensional– much more vibrant than my normal, non-highlighted/lowlighted dark brown color. The lighting/backdrop of the pics definitely does make it hard to see the real results, so I’d say that the color I got matched the color on the box. I can’t speak for the lighter brown or blonde shades, though, since I know going lighter is a little trickier with boxed color. Let me know if you have any other questions– happy to help!!
Ok that helps a lot! Thanks for getting back to me so quickly! I will definitely give this a try!