*This post may contain affiliate links, which means I may receive a commission (at no additional cost to you!) if you make a purchase using any of these links.*

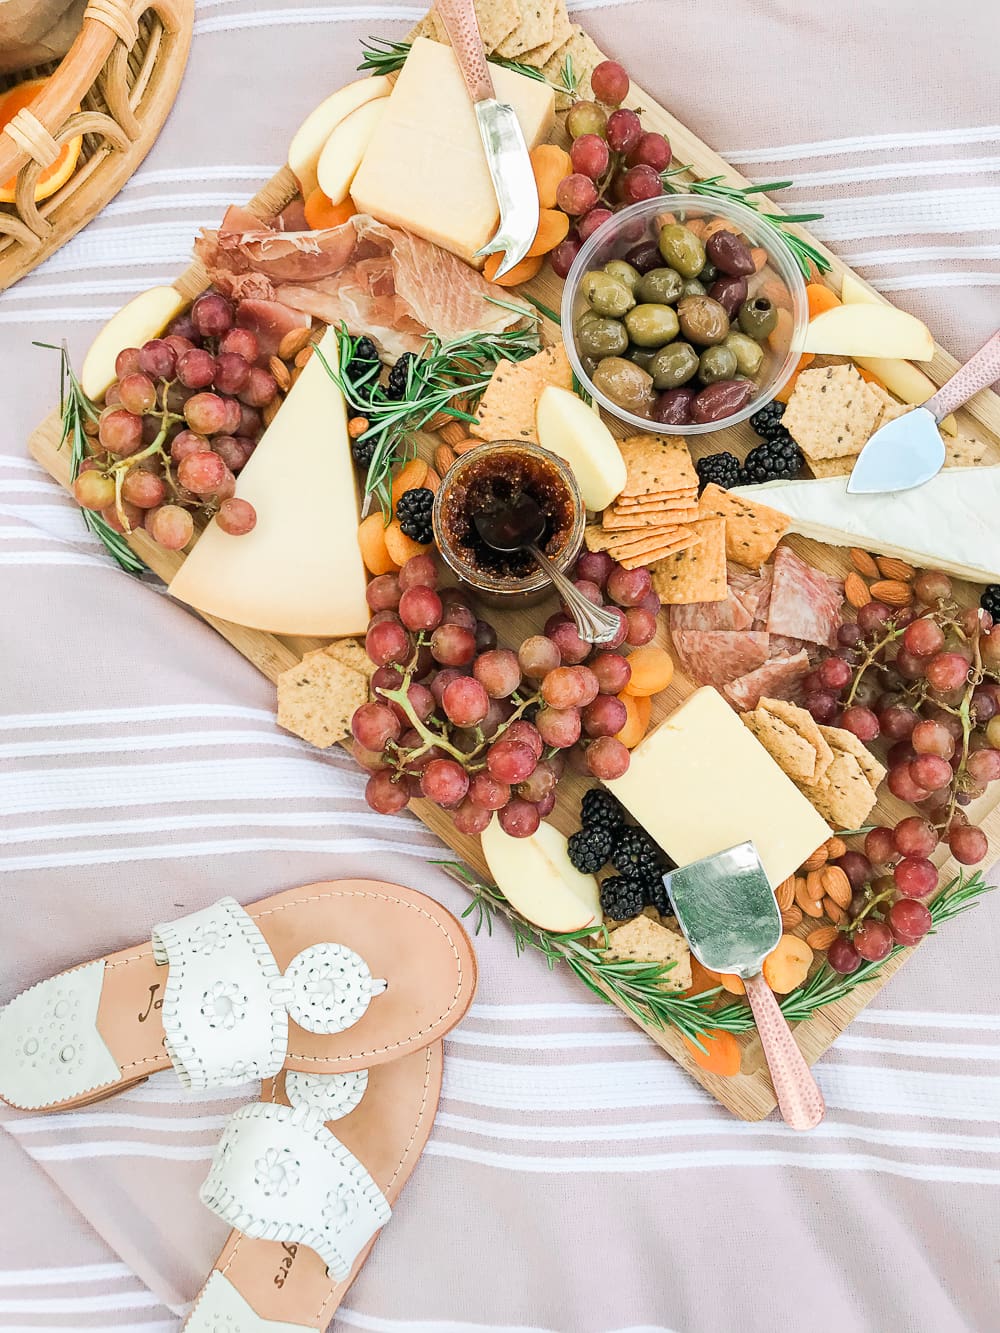
Very few things in this world excite me more than building the perfect cheese board for a party or romantic picnic. Not only is cheese one of my favorite foods, I love the colors and creativity that go into it. That being said, more goes into assembling a traditional charcuterie or cheese board than most people know. Selecting and pairing a neutral variety of low-cost grocery store cheeses with the right compliments can be an art. Over the years, I’ve purchased a handful of books about beautiful boards and platters (highly recommend this one and this one), and they’ve taught me some wonderful tips for assembling the perfect cheese board. Here are six of the best ones–
Tip #1: Choose a variety of cheeses.
Most cheeses belong to one of four basic categories: aged, soft, firm, or blue. For a good variety, try to choose at least one from each group. I personally cannot stand blue cheese, so I shy away from that category altogether. So, my perfect cheese plate consists of solely aged (Gouda, Aged Cheddar), soft (Brie, Camembert), and firm (Parmigiano Reggiano, Comte, or aged Gouda or Cheddar as a duplicate substitute).
Also, don’t forget that some people are allergic to dairy. If you’ve selected anything that could potentially be unrecognizable, label your cheeses to avoid any emergency EpiPen cameos.
Tip #2: Offer a selection of breads and crackers.
Similar to the cheeses, it’s a good idea to vary taste and texture in crackers and breads. In Kate Spade’s All in Good Taste, she suggests including plain bread (baguette, sourdough) and neutral crackers in a separate basket. Since you never know every guests’ dietary restrictions, I personally love Crunchmaster’s Multi-Seed Crackers, which are gluten-free, vegan, and made with 100% whole grain. They’re loaded with flavor and ultra-affordable, too.
Tip #3: Serve your cheese plate with a mixture of jarred condiments, fruits, and vegetables.
All of your guests’ palettes are different, so consider putting out a combination of honey, tart chutneys, and spicy mustards, as well as seasonal fruits and vegetables (seasonal=inexpensive), like raspberries and blueberries. Dried fruit is a great option, too, along with savory snacks like artichoke hearts, pickles, olives, and nuts. For an idea of ideal pairings, All in Good Taste recommends:
- mixing lighter cheeses (herb-coated goat cheese, buffalo mozzarella) with savory sides, like olives, prosciutto, cornichons, walnuts, tomato, fig chutney, and/or caramelized onion jam
- pairing rich cheeses (manchego, cheddar, gouda, blue) with sweet treats, like marcona almonds, fig or raspberry jam, honey or real maple syrup, and dried or sliced fresh fruit (pears, figs, raspberries, or blueberries).
Tip #4: Don’t overcrowd your cheese plate.
How much food goes on your cheese plate is totally arbitrary and up to you. I will say, though, that there is such a thing as a cheese board being overcrowded. If you can’t easily discern which snacks are which, you may want to create several smaller cheese platters instead of one mega board. Also, if you’re hosting a larger party, place them on separate tables to avoid any traffic jams.
If you find yourself having the opposite problem, there are some easy hacks for filling empty space. In my experience, grapes and herbs (specifically rosemary sprigs) work perfectly. You can also get really creative and use seasonal/regional decor, too. For example, I used some white mini pumpkins and eucalyptus on this fall cheese board and magnolia leaves on this southern-inspired cheese board.
Tip #5: Invest in the right presentation tools.
Every entertainer needs a large serving board and a set of cheese knives. My go-to tray is actually a bamboo cutting board from HomeGoods. It was super cheap, and it’s literally the perfect size for a prodigious charcuterie or cheese board. You can check out more affordable cutting/cheese boards here, too!
Tip #6: Have one knife per cheese.
According to Real Simple, soft cheese spreads work with a butter knife, firm cheese might require a paring knife, and aged cheese often requires a cheese plate. Using one knife per cheese, especially the softer varieties, avoids cross-contamination and keeps your perfect cheese plate looking pristine. It also helps to label the cheeses, as well, so guests don’t bombard you with “which is this?” inquiries.
Hope you enjoyed my tips on creating the perfect cheese board! Did I leave anything out?


Pingback: My Go-to Cocktail Appetizer: Easy Beef Tenderloin Crostinis
Pingback: The Perfect Fall Cheese Board | Diary of a Debutante
Pingback: How to Build a Summer Charcuterie Board + Whipped Feta Dip Recipe
Pingback: Southern-Inspired Beef Charcuterie Board Ideas | Diary of a Debutante
Pingback: Christmas Charcuterie Board Idea: How to Make a Charcuterie Wreath
Pingback: Cheese Board Ideas: How to Make a DIY Cheese Board with Pantry Items