
*This post may contain affiliate links, which means I may receive a commission (at no additional cost to you!) if you make a purchase using any of these links.*

If you were wondering why I haven’t posted on my blog for the past month, it’s because we did it! We got married! Not surprisingly, the stress of wedding planning caused me to be completely ineffective at work, so I just decided to tackle a handful of Cricut wedding projects for a few weeks– and these DIY welcome bags for wedding guests were one of my favorites! It took me a few tries (understatement) to get the process down pat, but the frustration was totally worth it. Everyone loved them, and it’s fun getting to see them toted around by family and friends, even weeks after the wedding.
I will say, though, that ironing onto burlap is a beast all its own. I’ve used HTV (heat transfer vinyl) for years now, and I’ve never had so much trouble getting consistent results. So, I’m sharing a DIY burlap wedding welcome bag tutorial in today’s post, including step-by-step Cricut iron-on instructions. While this iron-on project is tailored specifically for burlap, these tips are useful whenever you’re working with iron-on vinyl, regardless of the material you’re ironing onto. Just a heads up!
Tips for Using HTV on Burlap
Using HTV on burlap can be a tricky process. Burlap is a rough fuzzy fabric with loose weaving, so your settings need to be just right to get the iron-on vinyl to adhere to it. Here are a few things to keep in mind before taking on any big burlap projects–
1. Design an HTV-Friendly Decal
Whether you’re ironing onto burlap, wood, canvas, or glass, creating an HTV-friendly decal is super important. You can customize the design that I created in Cricut Design Space. Simply follow the instructions in the description to change it up. If you’re designing your own from scratch, here are a few things to keep in mind–
- Choose the Right Font– Be conscious of the font you use, especially when using heat transfer vinyl on burlap. Really thin fonts (specifically script fonts) can easily wrinkle during the ironing process and make the letters look wrinkled. Two of my personal favorite fonts are Magnolia Sky (script) and Big Caslon (print).
- Be Conscious of Size– If possible, try and make sure the entire decal can fit underneath the EasyPress (or iron). This one didn’t (I have the 9″x9″ EasyPress 2), and it resulted in some bubbles and wrinkling because certain areas were getting pressed twice while others weren’t getting enough heat and were peeling slightly. I found the right fix, but there was definitely a learning curve. Fortunately, Cricut now makes a 12″x10″ EasyPress, so if you’re planning on working with lots of shirts and bags, it’s probably worth the investment.
Also regarding the size, I definitely could’ve divided this design into two separately-cut pieces (the graphic and the text). I didn’t do this, but it would’ve saved me a TON of vinyl if I’d cut and ironed them on separately. Just something to think about with larger designs!
2. Follow Basic Cricut Iron-On Instructions
HTV (heat transfer vinyl aka iron-on vinyl) is much different than traditional adhesive vinyl, so following basic Cricut iron-on vinyl instructions is key. Cricut iron-on vinyl has a clear plastic carrier sheet that covers the top of the vinyl, and it’s transferrable by applying heat and pressure. Here are a few things to know if you’re new to working with HTV (on burlap or any other surface)–
- Choose the Right Settings– Once you’re ready to cut your design in Design Space, make sure the “Mirror” box is ticked and the material is set to iron-on. Also, make sure that your HTV vinyl is shiny side down on your mat. I’ve forgotten one and/or both of these steps when I step away from crafting for a while, and it just results in wasted vinyl. So, don’t be too hard on yourself if you do– but these two steps need to be done EVERY TIME.
- Weed Carefully– When weeding out your iron-on vinyl for larger designs (like mine), cut off the extra as you go. I also cut out each decal separately when creating multiple at once. Otherwise, the likelihood of accidentally peeling up smaller accents is much higher.
- Invest in Quality Materials*– I’m totally against buying things you don’t need, but if you like working with HTV, it’s worth investing in the Cricut EasyPress 2. It comes in multiple sizes, and it just makes life easier. Check their heat guide before ironing anything on, though. It’s not always spot-on, but it won’t ever tell you to heat up the iron beyond what it can take. I sometimes find the vinyl needs additional ironing time, but when I go rogue and bump up the temperature to try and expedite the process, I get wrinkled/ruined vinyl… so their recommendations are always a safe jumping-off point.
- Work in Batches– If you’re going to be making shirts or bags in bulk, do an initial run-through to make sure everything works (the vinyl cuts, the decal sticks, etc). After that, I recommend cutting all your vinyl and ironing on all your decals at once. At the very least, work in batches. Otherwise, it’ll be peak crafting chaos.
*Just a heads up– I don’t buy Cricut vinyl, especially not for Cricut iron-on projects like this. It’s just too expensive, and you can find equally amazing brands for a fraction of the price on Amazon. I used this brand for these DIY burlap wedding welcome bags, and it cost me less than $25!
3. Get Comfortable with Burlap
- Resist the Urge to Overheat– Burlap doesn’t take well to iron-on vinyl, and it’s frustrating. One of the first things I did was get annoyed and jack up the heat on my EasyPress 2. Don’t do that. Cricut recommends setting your iron to 305F, and that temperature’s worked really well for me, along with longer ironing times.
- Apply Firm Pressure– Use firm steady pressure to successfully apply HTV on burlap. Speaking from experience, if the iron moves even the tiniest smidge, your decal could be completely ruined.
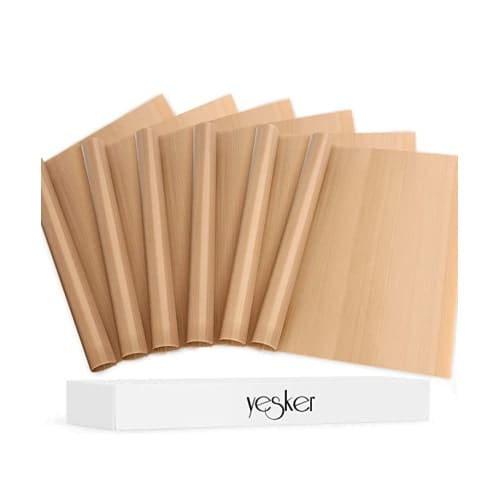
- Protect the Surface– Burlap burns easily, so protect the surface as often as you can with a Teflon sheet or parchment paper. Certain exceptions may call for unprotected ironing (see my tutorial below), but as a general rule, it’s a good idea to have some Teflon sheets handy.
DIY Welcome Bags for Wedding Guests

DIY Wedding Welcome Bag Materials
I’ll be honest– it took me a few goes before getting this formula right. Burlap is a beast all its own. Here’s everything I used to make these DIY Maine wedding welcome bags–
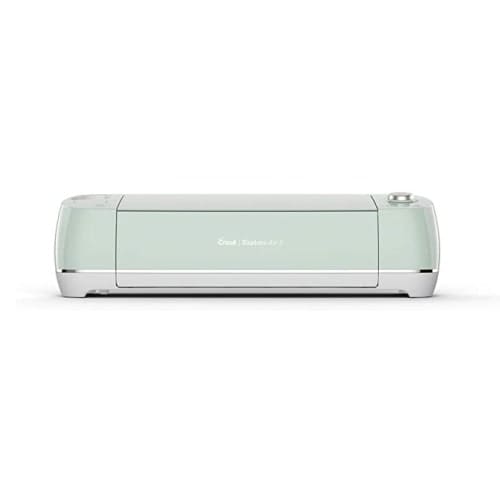
- Cricut Explore Air 2– I love my Explore Air 2, but any smart cutting machine will work! If you don’t have one, you can find some really cute HTV decals on Etsy!
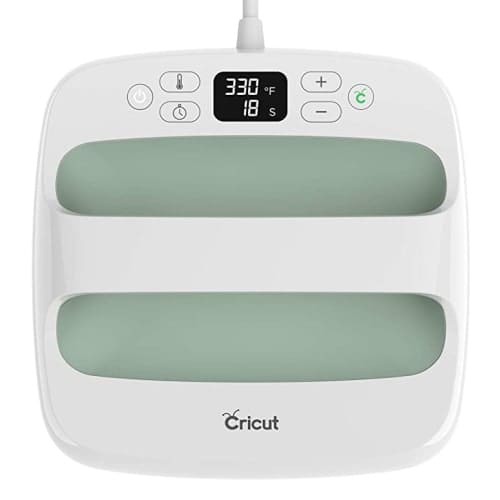
- Cricut EasyPress 2– I’m hesitant to say that a regular iron is an acceptable substitute, but it can be, depending on the size of your decal. I couldn’t have made these bags without my EasyPress 2!
- Burlap tote bags– I ordered these burlap tote bags! They come in a pack of six and are of incredible quality. Everyone loved them! They’re not always in stock, though, so I found here is an alternative option an even better price point!
- White HTV (Heat Transfer Vinyl)– Again, I don’t buy Cricut vinyl. It’s just too pricey. I buy this brand instead, and it’s just as awesome!
- Teflon sheet– Telfon helps protect the surface you’re ironing onto. I bought this pack, but if you don’t have any handy, wax and/or parchment paper work in a pinch, too.
- Weeding tool– HTV is harder to work with than normal vinyl, so I definitely recommend investing in a legitimate weeding tool. I own the Cricut version, but you can also find a more affordable, off-brand toolset here!
- Lint roller– Lint rollers clear the surface of extra fibers, making the vinyl more likely to adhere to it.
- Blue Chiffon Ribbon– I ordered this beautiful chiffon ribbon off Amazon and tied it around the handle to add some extra color to the bags. For reference, this color is dusty blue.
Click below to shop DIY wedding welcome bag supplies!

How to Make DIY Welcome Bags for Wedding Guests

Using HTV on burlap isn’t easy. All burlap surfaces are different, too, so you may need to adjust my method a little bit to work for your project. Scroll down for a step-by-step video tutorial and how-to craft card. In the meantime, though, here’s a rundown of how I created these DIY Maine wedding welcome bags, complete with Cricut iron-on vinyl instructions–
After creating my iron-on decal in Cricut Design Space, I grabbed a burlap tote and used a lint roller to remove any extra fibers that could cause the vinyl to not properly adhere to the burlap. Then, I heated up my EasyPress 2 to 305F. If you don’t have an EasyPress, a regular iron should work, although you’ll need to make sure to apply even heat to each part of your decal. Once the iron was preheated, I covered the burlap bag with a Teflon sheet and pre-heated the surface for 15 seconds.
Next, I covered the decal with a Teflon sheet and ironed it on for 20 seconds using firm pressure. Take care to not move the press, otherwise, the decal can wrinkle. If your decal’s larger than the iron, divide it into sections and repeat this step for each one. I personally had to do this (I separated the design by the Maine graphic and the text), and it worked well.
To be on the safe side, I waited 1-2 minutes before carefully pulling up the clear sheet. Parts of the decal hadn’t fully adhered to the burlap at this point, so after removing the clear sheet, I covered the bare decal with the Teflon sheet (again) and ironed it on for another 20 seconds. I repeated this process for both the Maine graphic and text sections.
While the decal was still warm, I used the weeding tool to fix a few little imperfections. Burlap and small and/or delicate fonts don’t work well together, so I smoothed out some of the wrinkled letters.
Also, even though the vinyl wasn’t going anywhere at this point, I really didn’t want to risk it peeling off. So, as a semi-final measure, I placed the iron directly onto the decal (without the Teflon sheet) for 15 seconds using firm pressure. I repeated this step for both the Maine graphic and text sections.
Finally, while the burlap was still warm, I flipped the bag over, carefully placed my EasyPress inside, and pressed again for 15 seconds. That was it– once I got the hang of using heat transfer vinyl on burlap, I got perfectly ironed burlap bags every time!
DIY Welcome Wedding Bags
These personalized burlap tote bags are the perfect way to welcome guests to your destination wedding! Practical, stylish, and memorable, you'll love seeing guests carrying these thoughtful keepsakes even long after the big day.
Materials
- Cricut Explore Air 2
- Cricut EasyPress 2
- Burlap tote bags
- Iron-on decal
- Teflon sheet
- Weeding tool
- Lint roller
- Blue ribbon
Instructions
- Design and cut your iron-on wedding welcome decal in Cricut Design Space. Remember to click "mirror" and set the material to iron-on before cutting. Use the weeding tool to carefully remove all excess HTV vinyl.
- Grab a burlap tote bag and use a lint roller to remove any extra fibers that could cause the vinyl to not properly adhere to the burlap.
- Heat up your heat press to 305F. If you don’t have an EasyPress, a regular iron should work, although you’ll need to make sure to apply even heat to each part of your decal. Once the iron is preheated, cover the burlap bag with a Teflon sheet and pre-heat the surface for 15 seconds.
- Cover the decal with a Teflon sheet and iron it on for 20 seconds using firm pressure. Take care to not move the press, otherwise, the decal can wrinkle. If your decal’s larger than the iron, divide it into sections and repeat this step for each one. I personally had to do this (I separated the design by the Maine graphic and the text), and it worked well.
- To be on the safe side, wait 1-2 minutes before carefully pulling up the clear sheet.
- Cover the bare decal with the Teflon sheet again and iron it on for another 20 seconds. Repeat this process for all sections.
- While the decal is still warm, use the weeding tool to fix a few little imperfections.
- Place the iron directly onto the decal (this time without the Teflon sheet) for 15 seconds using firm pressure. Repeat this step for all sections of the decal.
- Finally, while the burlap is still warm, flip the bag over, carefully place the EasyPress inside, and press again for 15 seconds.
- Wait a few seconds until the burlap bag is cool to the touch-- and enjoy!
Notes
- If you’re making shirts or bags in bulk, do an initial run-through to make sure everything works (the vinyl cuts, the decal sticks, etc). After that, I recommend cutting all your vinyl and ironing on all your decals at once. At the very least, work in batches to save time.
- If possible, try and make sure the entire decal can fit underneath your heat press. I used the 9″x9″ EasyPress 2, and it resulted in some bubbles and wrinkling because certain areas were getting pressed twice while others weren’t getting enough heat and were peeling slightly. Fortunately, Cricut now makes a 12″x10″ EasyPress, so if you’re planning on working with lots of shirts and bags, it’s probably worth the investment.
Tips for Using HTV on Burlap
- Resist the Urge to Overheat– Burlap doesn’t take well to iron-on vinyl, and it’s frustrating. One of the first things I did was get annoyed and jack up the heat on my EasyPress 2. Don’t do that. Cricut recommends setting your iron to 305F, and that temperature’s worked really well for me (along with longer ironing times).
- Apply Firm Pressure– Use firm steady pressure to successfully apply HTV on burlap. Seriously, if the iron moves even a smidge, your decal could be a complete bust.
- Protect the Surface– Burlap burns easily, so it's generally a good idea to protect the surface with a Teflon sheet or parchment paper. Certain exceptions may call for unprotected ironing, but as a general rule, it’s a good idea to have some Teflon sheets handy.
Recommended Products
As an Amazon Associate and member of other affiliate programs, I earn from qualifying purchases.

What to Put Inside Welcome Bags for a Destination Wedding

What you put in your DIY welcome bags for wedding guests is totally up to you! If you’re having a destination wedding, choose a theme and stick to it. Since we were getting married in Maine, we leaned into the whole nautical-blueberry theme. We also wanted to include things that (1) wouldn’t cost a fortune and (2) people would actually eat/drink/use during their stay.
Here’s everything we included in our Maine wedding welcome bags:
- Wedding welcome cards– I ordered these off Etsy! They printed and shipped them within a week, I think. For reference, this color is light blue.
- Bottled waters with personalized water bottle labels– I also ordered these water bottle labels off Etsy! Highly recommend this shop– they were great to work with. For reference, this color is light blue.
- Cans of blueberry wine– Turns out blueberry wine doesn’t taste the best, but when in Rome, right?!
- Tate’s Bake Shop blueberry crisp cookies– Holy cow these cookies are good! They’re limited edition, though, so if you see them in stores, grab them while you can! Each bag includes two individually wrapped trays of cookies, so we put each tray in one of these cellophane bags and then tied it with a pretty blue ribbon.
- Scandinavian Swimmers– A few years ago, Kyle’s mom gave us a bag of lobster-only Scandinavian Swimmers, and they would’ve been SO perfect for these bags. Turns out those were special edition, though, so we grabbed a bunch of regular bags from Trader Joe’s and divided them up into these smaller cellophane treat bags.
- Chocolate-covered blueberries– Similarly to the Scandinavian Swimmers, we bought a bunch of Trader Joe’s chocolate-covered blueberries and then divided them into these cellophane treat bags.
- Cape Cod chips– Nothing says New England like Cape Cod chips! In addition to being “on theme,” they’re budget-friendly, too.
Other fun New England-themed wedding welcome bag ideas are mini jars of Stonewall Kitchen blueberry jam, blueberry tea or coffee, lobster cookies or lollipops, Maine Root soda, Tom’s of Maine toothpaste, or pretty much anything from LL Bean. Mini bottles of champagne, “Do Not Disturb” door signs, and maps of the destination location are classic ideas, too.


I loved everything in our bags, but I really really loved these monogrammed water bottle labels. They shipped super fast and were easy enough for Kyle to stick on (granted, I had to fix a few). I definitely see myself ordering from this Etsy shop for events/parties in the future!


Super fun, right?! If you’re a New Englander or regular Maine vacationer, what else would you have put in your Maine wedding welcome bags?

More Cricut Wedding Projects to Try
I’m still playing catch up with blog posts, but stay tuned for the following DIY wedding projects in the coming weeks–
- Cricut Wedding Welcome Sign– I used a piece of birch plywood, some paint, and iron-on vinyl to create our own Cricut wedding welcome sign! It saved us $100+ and legitimately looked professionally made.
- DIY Wine Gift Bags– Following similar Cricut iron on instructions, this tutorial shows how to design and create custom wine gift bags that can be given to your bridesmaids, guests, or whoever you like.
- How to Make Your Own Dog Flower Collars– Okay, okay— this one’s not a Cricut wedding project, but it’s still one worth trying!
For more non-wedding-specific craft ideas, check out some of my favorite easy Cricut projects!
Thanks so much for reading, y’all! I know I crammed a lot of information into this post, so please let me know if you have any questions whatsoever. I’m happy to help!
Click below to shop the post!


I first tried this project with the cricut iron on vinyl I had on hand and it worked perfectly. But because I have multiple bags to complete, I purchased the vinyl you have linked. It was complete shit. Why would you link such a shitty product? I have to ask: did it really work for you?? Otherwise, thank you so much for your instructions and info, it truly was mostly all very helpful. I am just wondering if you really like that particular HTV brand.
Hey Kym!
Sorry to hear you had trouble with the off-brand HTV! I never link to products I don’t personally use, so yes, it really worked for me– incredibly well actually. I had to make 50ish bags, so paying double for Cricut iron-on vinyl wasn’t something I was going to do. What went wrong with it exactly?? If you tell me a specific problem (weeding trouble, vinyl winkles, etc), I might be able to help troubleshoot. Otherwise, glad you had success with Cricut! 🙂
xx,
Steph
Hello, I have been looking high and low for something like this. Is there any way you can tell me how to get a map of Greece with a heart in Athens. I just love your idea but totally new to this. Thank you