
*This post may contain affiliate links, which means I may receive a commission (at no additional cost to you!) if you make a purchase using any of these links.*

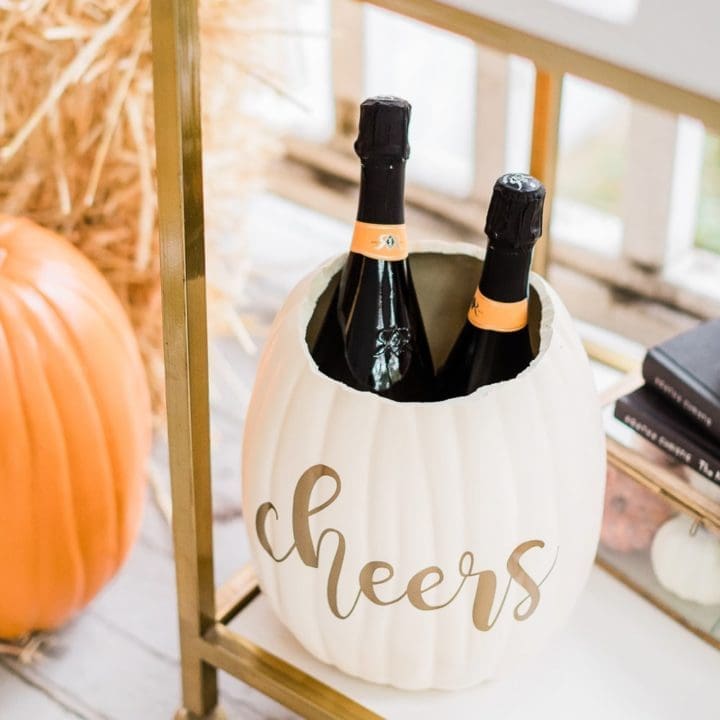
Foam pumpkins are seriously so handy to have around in October and November. Not only are they great for decorating as-is (check out this fun gold glitter monogram pumpkin!), but they’re also super easy to “carve” into unique fall decor that you can display year after year. I’ve cut the tops off and used them for a few different fall Cricut projects, including vases, candy jars, and (as of recently!) DIY pumpkin ice buckets! DIY pumpkin ice buckets are hands down my favorite, though, because (A) they’re super to personalize and (B) they make amazing fall hostess gifts. If you’re wanting to make one for yourself, they also look pretty darn adorable on Halloween bar carts, too. Keep reading for a step-by-step fall Cricut project tutorial, including a how-to video! If you’re not able to view it, either disable your adblocker or watch it over on YouTube.
Fall Cricut Project: DIY Pumpkin Ice Bucket

DIY Pumpkin Ice Bucket Materials
This DIY pumpkin ice bucket is absolutely adorable and the perfect addition to any Thanksgiving or Halloween bar cart. Also, it takes less than 10 minutes to create, and unlike a real pumpkin, you can reuse it year after year. Here’s all you need:
- Large foam craft pumpkin– It can be white or orange but needs to be big/tall enough to hold 1-2 bottles of wine. I found mine at Michael’s!
- Carving knife- Don’t worry, you don’t need anything fancy. The knife just needs to be sharp enough to cut through the pumpkin’s foam, which isn’t tough to do.
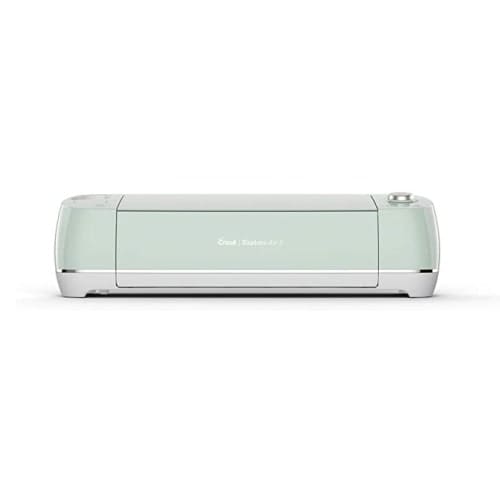
- Cricut Explore Air 2– I love everything about my Cricut Explore Air 2, but any comparable smart cutting device will do just fine.
- Permanent gold vinyl– As much as I love my Cricut, I don’t use Cricut vinyl. This budget-friendly vinyl on Amazon is less than half the cost and works just as well.
- Contact paper– Contact paper makes transferring vinyl decals simple and seamless. I use this brand!
- Cellophane wrap– Neither cellophane wrap nor Cling Wrap lets water get through, so they make great makeshift waterproofing solutions. I prefer cellophane wrap, but Cling Wrap works just as well and is probably already laying around your kitchen.
- Weeding and scraper tools– I love my Basic Cricut Tools, but you can totally make do with items around the house.
Fall Cricut Project Tutorial
To get started, grab a large foam pumpkin and cut the top off, just like you would with a normal jack-o-lantern. As a reference, the hole should be wide enough to hold 1-2 bottles of wine. I used an old carving knife (nothing fancy), and it cut through the foam seamlessly.

Next, log into Cricut Design Space. You can either design your own decal (“booze” or “drinks” would be super cute, too!) or you can click here to use the “cheers” template I created. FYI- I chose “cheers” because I figured it could work well for Thanksgiving, too. If you’d rather make your own, I used the Magnolia font and resized the decal to 9″ wide.
Set up the gold vinyl on your cutting mat and click “Make It” in Design Space. The Cricut Explore Air 2 will cut the decal in about a minute.

Next, use your Cricut weeding tool to carefully remove all the excess vinyl from your design. Once your decal is weeded and ready to go, transfer it to your pumpkin with contact paper. If you have trouble getting the vinyl to stick to the contact paper, I highly recommend running the Cricut scraper tool (or a small book or credit card) over it a few times. It works like a charm.

Finally, after (carefully!) removing the transfer paper, your DIY pumpkin ice bucket is ready to hold some drinks! One final tip, though– before adding any ice, cover the inside with cellphone wrap. It’s discrete, effective, and will help preserve the inside of your foam pumpkin from all the melted ice.

Super cute right?! And it’s SO easy, too. I think mine took 10 minutes to make from start to finish.
Also, if you’ve got any extra foam pumpkins lying around, these make amazing DIY hostess gifts! Pop in a bottle or two of white wine or champagne, and trust me– you’ll have one happy host.

I know I sound like a broken record, but seriously, how cute does this DIY pumpkin ice bucket look on my Halloween bar cart?! I’m obsessed, and I wish I could use it year-round!


DIY Pumpkin Ice Bucket
This adorable DIY pumpkin ice bucket is the perfect fall Cricut project for beginners!
Materials
- Large foam craft pumpkin
- Carving knife
- Permanent gold vinyl
- Contact paper
- Cellophane wrap
Tools
- Cricut Explore Air 2
- Weeding Tool
- Scraper Tool
Instructions
- Cut the top off of a large foam pumpkin. The hole should be wide enough to hold 1-2 bottles of wine.
- Log into Cricut Design Space. You can either design your own decal (“booze” or “drinks” would be super cute, too!) or you can click here to use the “cheers” template I created. I chose it because I figured it could work well for Thanksgiving, too. For reference, I used the Magnolia font.
- Set up the gold vinyl on your cutting mat and click “Make It” in Design Space. The Cricut Explore Air 2 will cut the decal in seconds.
- Use your weeding tool to weed out your "Cheers" decal. Once your decal is weeded and ready to go, transfer it to your pumpkin with contact paper. If you have trouble getting the vinyl to stick to the contact paper, run the scraper tool (or a small book or credit card) over it a few times.
- Remove the contact paper and, before adding any ice, cover the inside with cellphone wrap. It’s discrete, effective, and will help preserve the inside of your foam pumpkin from all the melted ice.
- Pop in some bottles of wine and enjoy your adorable new DIY pumpkin ice bucket!
Recommended Products
As an Amazon Associate and member of other affiliate programs, I earn from qualifying purchases.
More Easy Fall Cricut Projects to Try
In all honesty, this DIY pumpkin ice bucket is probably my favorite fall Cricut project I’ve created so far. It’s just so simple (about as basic of a Cricut vinyl project as you can get) and perfect for beginner Cricut users. If you’re looking for more beginner-to-moderate Cricut fall projects, you’ll love these posts, too–
- DIY Fall Wine Gift Bags– If you’re looking for a way to dress up a basic bottle of wine, these DIY wine bags are perfect for thanking your Thanksgiving host! You need HTV vinyl and an EasyPress (or large reliable iron) to complete this project, though. Just a heads up!
- Glitter Monogram Pumpkin– This DIY glitter monogram pumpkin is another Cricut vinyl project, and it’s as basic as it gets. These make amazing gifts (especially DIY housewarming gifts!) for newly married couples, too!
- DIY “Hey There Pumpkin” Doormat– You’ll never pay for a doormat again after seeing how easy it is to make your own! All you need to make this DIY door mat is basic vinyl (or any material you can use to create a custom stencil), acrylic paint, and polyurethane spray.
Anyway, thanks so much for reaching, y’all! As always, let me know if you have questions. Whether you need clarification on this tutorial or more fall Cricut project inspiration, I love hearing from you guys, and I’m happy to help!

